Are you struggling with recording employee reimbursements in QuickBooks? Fret not! In this comprehensive guide, we will take you through the step-by-step process of how to reimburse employee in QuickBooks and how to record reimbursement in QuickBooks transactions accurately.
Understanding Employee Reimbursements

Before we delve into the specifics of recording employee reimbursements in QuickBooks, it’s essential to understand what employee reimbursements entail.
Employee reimbursements refer to the money an employer gives to an employee to cover expenses incurred on behalf of the company. These expenses may include business travel, meals, lodging, and other work-related expenses. Employers may opt to reimburse employees for these expenses, especially if they have a clear reimbursement policy in place.
It’s crucial to record these transactions in QuickBooks to maintain accurate financial records and ensure that reimbursements don’t affect the company’s books.
How to Reimburse Employee in QuickBooks
Now, let’s dive into the steps of reimbursing employees in QuickBooks.
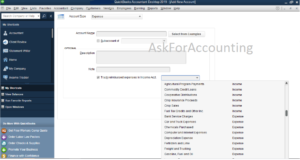
Step 1: Set Up a Reimbursement Account
The first step to recording employee reimbursements in QuickBooks is to set up a reimbursement account. To setup, follow the steps below:
- From the main menu, click on “Lists” and select “QuickBooks Chart of Accounts“.
- Click on “New Account” and select “Expense” as the account type.
- Give the Name “Employee Reimbursements” to the account and click “Save & Close”.
Step 2: Create a Vendor Profile for the Employee
The next step is to create a vendor profile for the employee. Follow these steps:
- From the main menu, click on “Vendors” and select “Vendor Center.”
- Please select “New Vendor” and input the employee’s details.
- Please click on “Additional Info” and choose the “Expense” tab.
- Select the “Employee Reimbursements” account you created earlier as the default account for reimbursable expenses.
- Click “OK” to save the vendor profile.
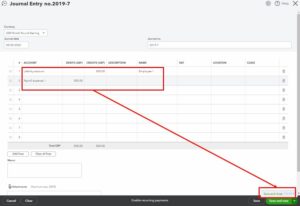
Step 3: Create a Reimbursement Check
Once you’ve set up the reimbursement account and created a vendor profile for the employee, you can now create a reimbursement check. Follow these steps:
- From the main menu, click on “Banking” and select “Write Checks.”
- Choose the name of the employee from the “Pay to the Order of” section.
- In the “Expenses” tab, select the account for the expense you’re reimbursing.
- Enter the amount of the reimbursement in the “Amount” field.
- To save the transaction, click on the “Save & Close” button.
Step 4: Reconcile the Reimbursement Check
The final step is to reconcile the reimbursement check to ensure that it matches the employee’s records. To do this, follow these steps:
- From the main menu, click on “Banking” and select “Reconcile.”
- Select the account from which you issued the reimbursement check.
- Enter the statement date and ending balance.
- Match the reimbursement check to the employee’s records.
- Click “Finish Now” to reconcile the account.
How to Recording Reimbursements in QuickBooks
Apart from reimbursing employees, it’s crucial to record these transactions in QuickBooks to maintain accurate financial records. Follow these steps to record reimbursements in QuickBooks:
- From the main menu, click on “Banking” and select “Record Deposits.”
- Select the bank account to which the reimbursement was deposited.
- Enter the reimbursement amount in the “Amount” field.
- In the “From Account” field, select the “Employee Reimbursements” account you set up earlier.
- Click “Save & Close” to record the reimbursement transaction.
Conclusion
Recording employee reimbursements in QuickBooks is a crucial aspect of maintaining accurate financial records. By following the step-by-step guide we’ve provided, you can ensure that you accurately reimburse employees and record these transactions in QuickBooks.
Frequently Asked Questions (FAQs)
Q1. Can I reimburse employees for expenses without recording them in QuickBooks?
No, it’s not recommended to reimburse employees without recording these transactions in QuickBooks. QuickBooks is an essential tool for maintaining accurate financial records and recording employee reimbursements ensuring that these transactions are included in your financial statements. Failing to record these transactions can lead to inaccuracies in your financial statements and potentially cause issues with tax reporting. It’s crucial to record all financial transactions in QuickBooks to ensure the financial health of your business.
Q2. Can I set up multiple reimbursement accounts in QuickBooks?
Yes, you can set up multiple reimbursement accounts in QuickBooks to track expenses in different categories. By setting up multiple reimbursement accounts, you can track expenses related to different departments or expense types, such as travel expenses or office supply expenses. To set up a new reimbursement account, go to the Chart of Accounts and click on “New Account.” Select the account type as “Expense” and choose a suitable name for the account.
Q3. Can I reimburse employees for non-work-related expenses?
Yes, you can reimburse employees for non-work-related expenses, but it’s essential to have a clear reimbursement policy in place. Your reimbursement policy should clearly outline which expenses are eligible for reimbursement and which are not. Non-work-related expenses can include things like personal phone bills or parking tickets. It’s important to ensure that you have a clear and consistent reimbursement policy to avoid any confusion or disputes with employees.

