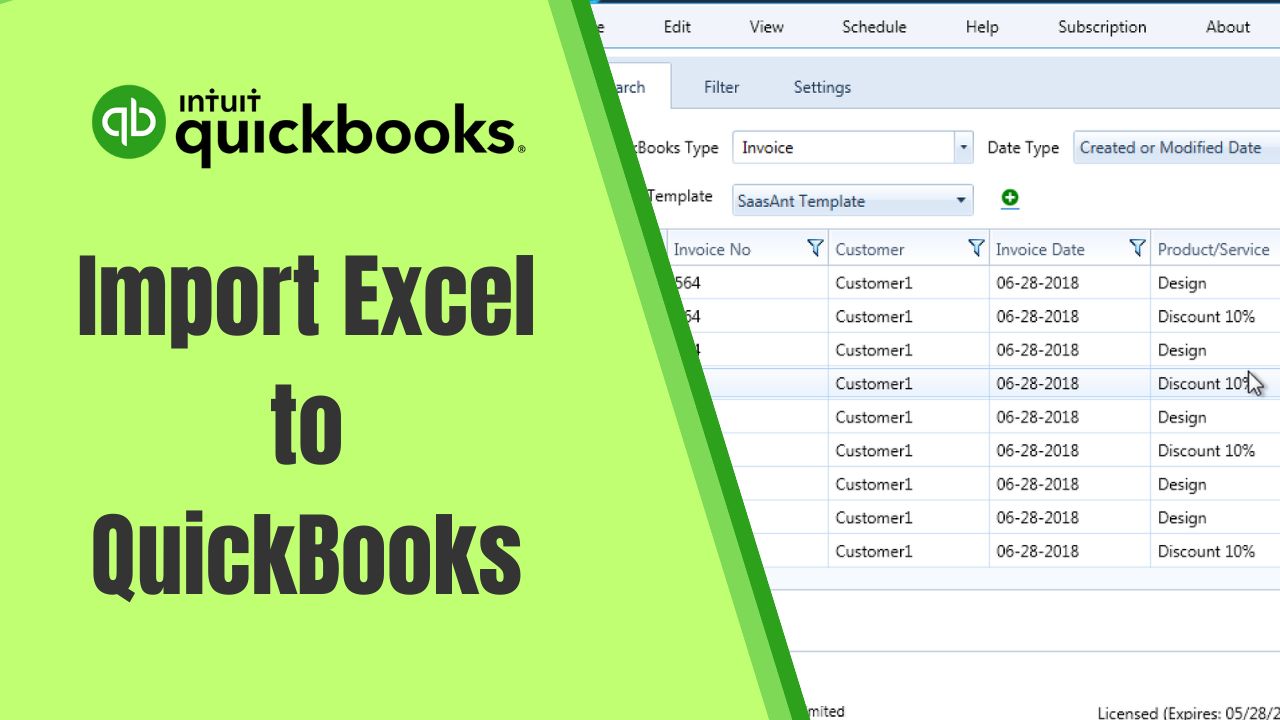
QuickBooks is one of the most popular accounting software programs used by small and medium-sized businesses. It is known for its ease of use, versatility, and ability to streamline financial management. One of the most important features of QuickBooks is its ability to import data from external sources such as Excel and CSV files. In this article, we will discuss the process of import Excel to QuickBooks and CSV too, and how to use the QuickBooks Import Excel and CSV Toolkit to make the process even easier.
Understanding the Importance of Import Excel to QuickBooks
QuickBooks is an accounting software that provides features such as invoicing, expense tracking, and inventory management. It is used by businesses to manage their financial transactions and keep track of their financial health. Excel spreadsheets, on the other hand, are used for various purposes such as budgeting, forecasting, and data analysis. Importing data from Excel to QuickBooks is necessary when businesses want to combine their financial data from different sources to get a comprehensive overview of their financial health.
Preparing Your Excel Data for Import
Before import Excel to QuickBooks, you need to make sure that your data is in the correct format. QuickBooks only accepts certain file formats, so it’s important to convert your Excel data to a compatible format. The following steps will help you prepare your Excel data for import:
Step 1: Check the File Format
QuickBooks accepts Excel files in the .xls, .xlsx, and .csv formats. Check the format of your Excel file before proceeding with the import.
Step 2: Clean up the Data
Clean up your Excel data by removing any unnecessary columns or rows. Ensure that your data is consistent and follows a standard format.
Step 3: Add Headers
Add headers to your Excel file to ensure that QuickBooks can import your data correctly. QuickBooks requires certain headers for different types of data.
Import Excel to QuickBooks
Now that you have prepared your Excel data for import, you can proceed with the import process. Follow the steps below to import Excel to QuickBooks:
Step 1: Open QuickBooks
Open QuickBooks Account and go to the File menu. Click on Utilities and then select Import.
Step 2: Select the Excel File
Select the Excel file you want to import and click on Open. QuickBooks will prompt you to select the type of data you want to import.
Step 3: Map the Fields
Assign the fields in your Excel document to their corresponding fields in QuickBooks. QuickBooks will provide you with a list of fields that you can map your Excel data to.
Step 4: Preview and Import the Data
Preview the data before importing it to QuickBooks. Once you are satisfied with the preview, click on Import to import the data to QuickBooks.
Import CSV QuickBooks
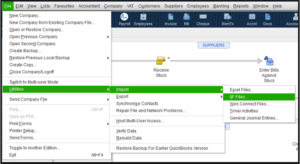
To import data from a CSV file into QuickBooks, follow these steps:
- Open QuickBooks and select “File” from the main menu.
- Click on “Utilities” and then select “Import” from the drop-down menu.
- Choose the type of data you want to import and select “CSV files” from the list of available file types.
- Browse for the CSV file you want to import and select it.
- Map the fields in your CSV file to the corresponding fields in QuickBooks.
- Click “Import” to start the import process.
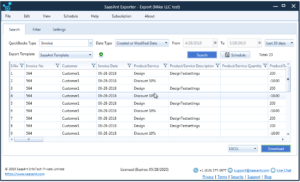
Using the QuickBooks Import Excel and CSV Toolkit
The QuickBooks Import Excel and CSV Toolkit is a free add-on for QuickBooks that simplifies the process of importing data from Excel and CSV files. Here’s how to use it:
- You can download and install the QuickBooks Import Excel and CSV Toolkit.
- Open the toolkit and select the type of data you want to import.
- Browse for the Excel or CSV file you want to import and select it.
- Map the fields in your file to the corresponding fields in QuickBooks.
- Click “Import” to start the import process.
The QuickBooks Import Excel and CSV Toolkit also includes a feature that allows you to save your field mapping for future imports. This can save you time if you need to import data on a regular basis.
Tips for Successful Data Import
Importing data from external sources can be a tricky process, but there are some things you can do to make it easier:
- Make sure your data is formatted correctly. QuickBooks has specific requirements for the format of the data you want to import.
- Use the field mapping tool to ensure that your data is imported correctly.
- Test your import on a small sample of data before importing a large file.
- Back up your QuickBooks data before importing any external data.
Troubleshooting Common Issues
Sometimes, the import process may not go smoothly. Here are some common issues that you may encounter when importing Excel data to QuickBooks and how to troubleshoot them:
Issue 1: Incorrect Field Mapping
If the fields in your Excel file are not mapped correctly to the corresponding fields in QuickBooks, you may encounter errors when importing the data. To fix this, review the field mapping and make sure that the correct fields are mapped.
Issue 2: Data Format Errors
If the data in your Excel file is not in the correct format, QuickBooks may not be able to import the data. Make sure that your data follows a standard format and is consistent.
Issue 3: Duplicate Data
If there is duplicate data in your Excel file, QuickBooks may not be able to import the data correctly. Remove any duplicate data before importing the file.
Conclusion
Import Excel to QuickBooks and CSV can be a time-consuming process, but it is an important task for small and medium-sized businesses that need to manage their finances effectively. With the help of the QuickBooks Import Excel and CSV Toolkit, this process can be simplified and streamlined, saving you time and effort. Just be sure to follow the tips we’ve outlined above to ensure a successful import.
Frequently Asked Questions (FAQs)
Q1.Can I import historical data into QuickBooks from Excel?
Yes, you can import historical data from Excel into QuickBooks. To do so, you’ll need to create a new account for each account in your Excel sheet and manually enter your account balances as of the start date for each account. You’ll also need to enter any historical transactions manually. This process can be time-consuming, but it’s worth it if you need to have a complete record of your financial history in QuickBooks.
Q2. What file formats are compatible with QuickBooks for importing data?
In addition to Excel files, QuickBooks supports importing data from other file formats, including CSV, QFX, QIF, and OFX files. However, it’s important to note that each file format has its own specific requirements for formatting data, so it’s essential to ensure that your data is in the correct format before importing it to QuickBooks.
Q3. How can I import historical transactions into QuickBooks using Excel or CSV files?
To import historical transactions into QuickBooks, you’ll need to use a third-party tool or service that can convert your historical data into a format that QuickBooks can understand. One option is to use a service like Transaction Pro Importer or SaasAnt Transactions, which can help you import data from a variety of file formats and sources. Alternatively, you may be able to work with a QuickBooks expert or accountant who can help you import your historical data using a custom solution.

