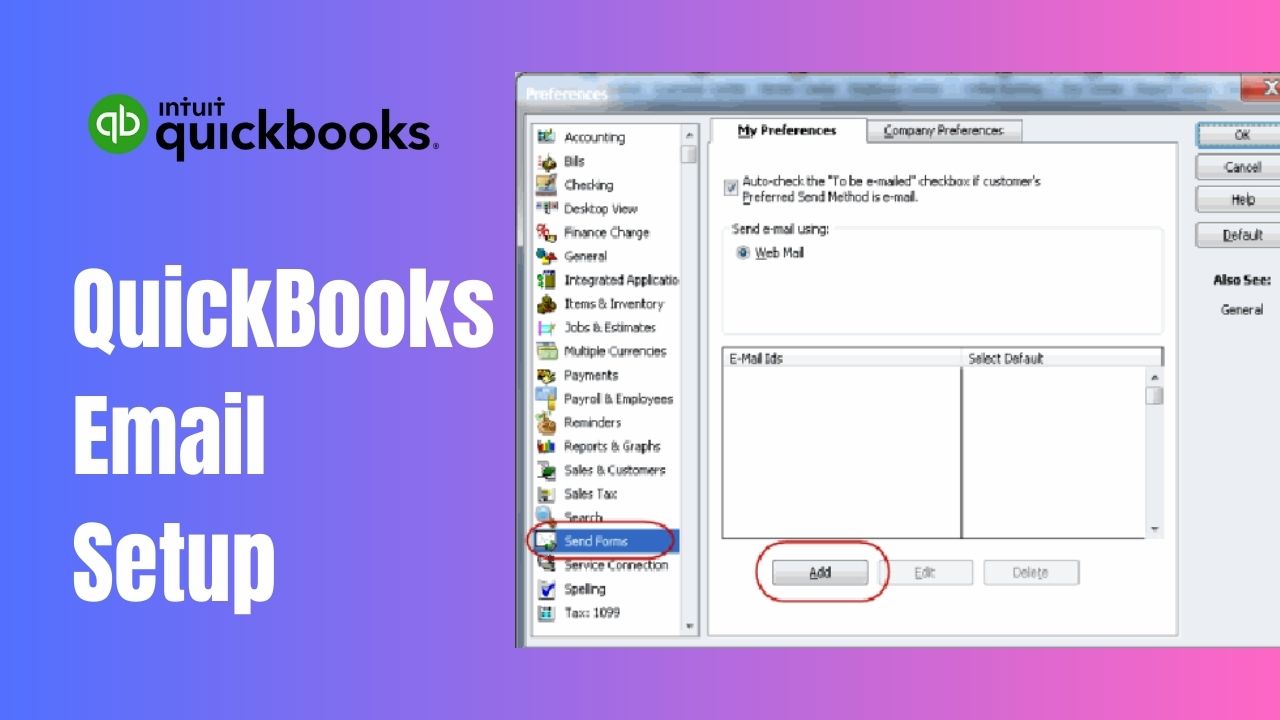
QuickBooks is an excellent tool for managing business finances, and it has become increasingly popular in recent years. One feature that users particularly appreciate is the ability to set up email in QuickBooks. This feature allows users to send invoices, estimates, and other documents directly from QuickBooks, saving time and streamlining the process. In this article, we will guide you through the process of setting up email in QuickBooks and provide you with the necessary steps to configure your email settings.
Set Up Email in QuickBooks
QuickBooks Email setup is a relatively straightforward process that can be completed in just a few simple steps. The first step is to ensure that your email provider is compatible with QuickBooks. QuickBooks supports a wide range of email providers, including Gmail, Outlook, Yahoo Mail, and Office 365. If you are unsure whether your email provider is compatible, we recommend contacting QuickBooks support for assistance.
Once you have confirmed that your email provider is compatible, you can begin the setup process. The first step is to open a QuickBooks account and navigate to the “Edit” menu. To proceed, choose “Preferences” and subsequently “Send Forms.” You will then be prompted to enter your email address and select your email provider from a list of options.
Next, you will need to enter your email login credentials, including your username and password. Once you have entered your login credentials, QuickBooks will attempt to verify your account. If successful, you will be prompted to select your outgoing email server settings. QuickBooks will provide you with a list of recommended settings for your email provider, but you can also enter your own settings if you prefer.
After configuring your outgoing email server settings, you will need to test your email setup. QuickBooks provides a test email function that allows you to send a test email to your own email address to ensure that your setup is working correctly. If you receive the test email, your email setup is complete, and you can begin sending emails directly from QuickBooks.
QuickBooks Email Settings
In addition to QuickBooks setup email, there are several email settings that you can configure to customize your email experience. To access these settings, open QuickBooks and navigate to the “Edit” menu. To access it, choose “Preferences” and then navigate to “Send Forms.”
One important setting to consider is the default email message that will be included with all emails sent from QuickBooks. You can customize this message to include your company logo, contact information, and other important details. You can also configure default subject lines and email templates to further streamline the email process.
Another useful feature is the ability to send invoices and estimates as PDF attachments. This feature ensures that your documents look professional and can be easily opened by your clients. To enable this feature, navigate to the “Edit” menu and select “Preferences.” From there, select “Send Forms” and then “Company Preferences.” Finally, check the box labeled “Attach PDF.”
QuickBooks Email Setup Office 365
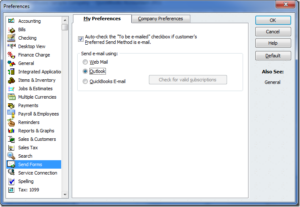
If you are using Office 365 as your email provider, setting up email in QuickBooks is a straightforward process. To begin, open QuickBooks and navigate to the “Edit” menu. To access the option, choose “Preferences” followed by “Send Forms.” You will then be prompted to enter your email address and select “Office 365” as your email provider.
Next, you will need to enter your Office 365 login credentials, including your username and password. Once you have entered your login credentials, QuickBooks will attempt to verify your account. If successful, you will be prompted to select your outgoing email server settings. QuickBooks will provide you with a list of recommended settings for Office 365, but you can also enter your own settings if you prefer.
After configuring your outgoing email server settings, you will need to set up email in QuickBooks to start sending and receiving emails directly from within the software. Set up email in QuickBooks is a simple process that can be completed in a few easy steps.
To set up email in QuickBooks, follow these steps:
- Open QuickBooks and click on “Edit” in the top menu bar.
- Select “Preferences” from the drop-down menu.
- Please click on the option labeled “Send Forms” located in the menu on the left-hand side.
- To create a new email account, simply press the “Add” button.
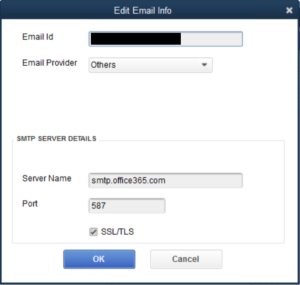
- Select the email provider you are using, such as Gmail or Office 365, from the drop-down menu.
- Please input your email address and password into the designated fields.
- Click on “OK” to save your settings.
Once you have set up your email account in QuickBooks, you can start sending and receiving emails directly from within the software. This can save you time and improve your efficiency, as you will not need to switch back and forth between QuickBooks and your email client to manage your correspondence.
If you are using Office 365 as your email provider, there are a few additional steps you may need to take to set up email in QuickBooks. First, you will need to make sure that you have enabled access to less secure apps in your Office 365 account settings. This will allow QuickBooks to connect to your email account and send emails on your behalf.
To enable access to less secure apps in Office 365, follow these steps:
- Log in to your Office 365 account and click on the “Settings” icon in the top right-hand corner of the screen.
- Select “Options” from the drop-down menu.
- Click on “Account” in the left-hand menu.
- To access the “Manage security and privacy” settings, simply navigate to the section labeled “Security and privacy” and scroll down until you find the option.
- Please scroll down to the section labeled “Less secure app access” and change the toggle switch to the “On” position.
Once you have enabled access to less secure apps in your Office 365 account, you can follow the steps above to set up email in QuickBooks.
If you are using Gmail as your email provider, you may need to configure your Gmail settings to allow QuickBooks to connect to your email account. To do this, you will need to create a new app password for QuickBooks in your Google Account settings.
To create a new app password for QuickBooks in your Google Account settings, follow these steps:
- Log in to your Google Account and click on “Security” in the left-hand menu.
- Scroll down to the “Third-party app passwords” section and click on “Generate app password”.
- Select “QuickBooks” from the drop-down menu.
- Please click on the “Generate” button to generate a new application password.
- Copy the app password to your clipboard.
- Follow the steps above to set up an email in QuickBooks, entering your email address and the app password you just generated in the appropriate fields.
By following these steps, you can easily set up email in QuickBooks and start sending and receiving emails directly from within the software. This can save you time and improve your productivity, helping you to focus on the important tasks that will grow your business.
Conclusion
In conclusion, set up email in QuickBooks can greatly improve your business’s efficiency and communication with customers. By following the steps outlined in this article, you can easily configure your outgoing email server settings, and QuickBooks email setup accounts, and customize your email templates to fit your business’s needs.
Remember, choosing the right email provider and ensuring your settings are properly configured is crucial to ensuring your emails are delivered to your customers’ inboxes. Take the time to double-check your settings and test your emails to ensure they are working properly.
Frequently Asked Questions (FAQs)
Q1. Can I use my personal email account with QuickBooks?
Yes, you can use your personal email account with QuickBooks. QuickBooks supports a wide range of email providers, including Gmail, Yahoo, and Outlook. When setting up your email account in QuickBooks, simply select “Other” as your email provider and enter your email address and password. QuickBooks will automatically configure your email settings and allow you to send and receive emails directly from your personal email account.
Q2. How do I test my QuickBooks email settings?
To test your QuickBooks email settings, open QuickBooks and navigate to the Edit menu. Select Preferences, then Send Forms. Click the My Preferences tab and select the email account you want to test. Click the Test button and follow the prompts to send a test email. QuickBooks will display a message confirming that your email settings are working correctly. If you encounter any issues, double-check your email server settings and make sure that your email provider allows SMTP traffic.
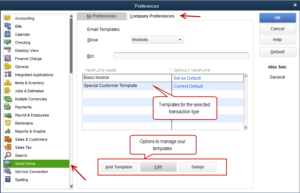
Q3. How do I customize my QuickBooks email templates?
To customize your QuickBooks email templates, open QuickBooks and navigate to the Edit menu. Select Preferences, then Send Forms. Click the Company Preferences tab and select the email template you want to customize. Click the Edit button and make any necessary changes to the email subject line, message body, or signature. You can also add attachments or change the default message format. When you’re finished, click OK to save your changes. QuickBooks will automatically use your custom email template for all future email communications.

