If you’re using QuickBooks for your business accounting, it’s important to know how to record loan payments in QuickBooks accurately. Whether you’re using QuickBooks Online or QuickBooks Desktop, properly tracking loan payments ensures that your financial records remain accurate and up-to-date. In this article, we’ll guide you through the process of recording loan payments in QuickBooks, covering both QuickBooks Online and QuickBooks Desktop versions.
Accurate recording of loan payments is essential for maintaining financial transparency and understanding your business’s financial health. QuickBooks provides powerful tools to help you efficiently manage your loans and record payments. By following the steps outlined in this article on how to record loan payments in QuickBooks, you can ensure that your loan payments are accurately reflected in your QuickBooks accounts.
Understanding Loan Payments in QuickBooks
Before we dive into the process of recording loan payments, let’s take a moment to understand how loan payments affect your QuickBooks accounts. When you make a loan payment, it typically consists of both principal and interest components. The principal payment reduces the outstanding loan balance, while the interest payment covers the cost of borrowing. It’s important to allocate loan payments correctly to maintain accurate loan balances and interest calculations.
Setting Up Loan Accounts in QuickBooks
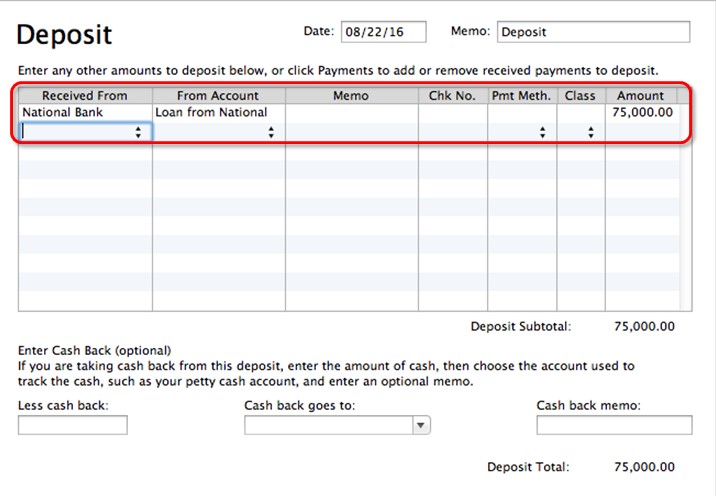
To get started with recording loan payments, you need to set up loan accounts in QuickBooks. Follow these steps to create loan accounts:
- Open QuickBooks and navigate to the Chart of Accounts.
- Click on “New” to create a new account.
- Select the appropriate account type, typically “Long-Term Liabilities” or “Other Current Liabilities.”
- Provide a name for the loan account and enter a description if desired.
- Enter the loan amount as the opening balance.
- Save the account.
By setting up loan accounts in QuickBooks, you can easily track loan balances and record payments accurately.
How to Record Loan Payments in QuickBooks Online
If you’re using QuickBooks Online, follow these steps on how to record a loan payments in QuickBooks
Step 1: Navigate to the Banking Center
- Log in to your QuickBooks Online account.
- From the left menu, select “Banking” and then choose “Banking” again.
- You’ll be directed to the Banking Center, where you can view and manage your connected bank accounts.
Step 2: Create a New Loan Payment
- In the Banking Center, click on “Loan Payment” or “Record Loan Payment” (the exact wording may vary depending on your version of QuickBooks Online).
- Select the appropriate loan account from the dropdown menu.
- Enter the payment date, payment method, and payment amount.
Step 3: Enter Payment Details
- Allocate the payment amount to the principal and interest portions of the loan payment. QuickBooks Online provides an option to automatically calculate the interest based on the payment date and interest rate.
- If the payment amount differs from the calculated interest, adjust the amounts accordingly.
- Ensure that the allocated amounts match the actual payment you made.
Step 4: Allocate Payment to Loan Principal and Interest
- In the “Allocation” section, specify the amounts to allocate to principal and interest.
- QuickBooks Online will automatically adjust the remaining balance of the loan account based on your allocation.
- Verify that the allocated amounts are correct before saving the transaction.
Following these steps, you can accurately record loan payments in QuickBooks Online and maintain accurate loan balances.
How to Record Loan Payments in QuickBooks Desktop
If you’re using QuickBooks Desktop, the process of recording loan payments is slightly different. Here’s how you can do it:
Step 1: Open the Loan Manager
- Launch QuickBooks Desktop and navigate to the “Banking” menu.
- From the drop-down menu, select “Loan Manager” to open the Loan Manager window.
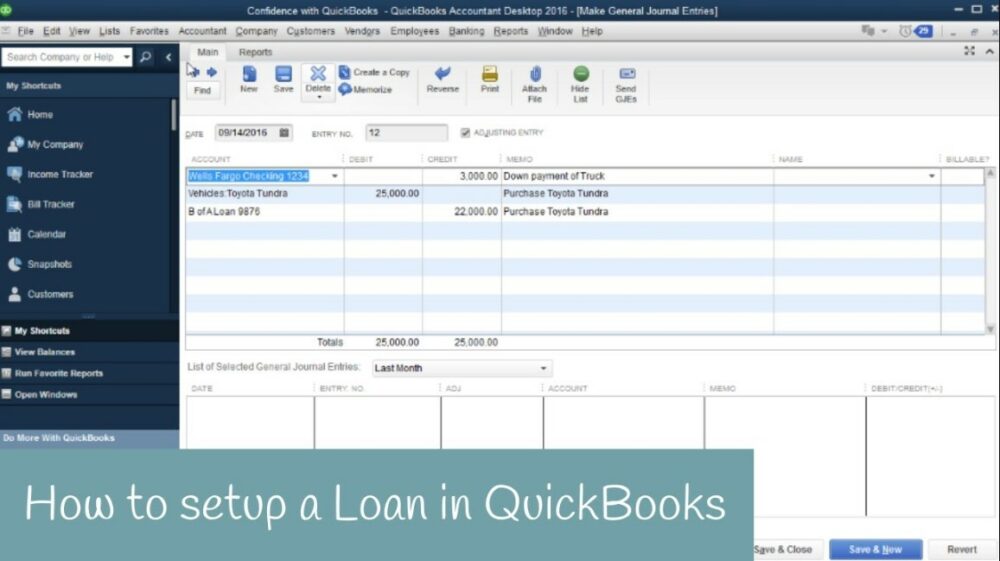
Step 2: Add a New Loan
- In the Loan Manager window, click on “Add a Loan” to add a new loan to QuickBooks Desktop.
- Enter the loan details, including the loan name, lender information, and loan amount.
- Specify the loan start date and payment frequency.
Step 3: Record Loan Payments
- Once you’ve added the loan, go back to the Loan Manager window and select the loan you want to record payments for.
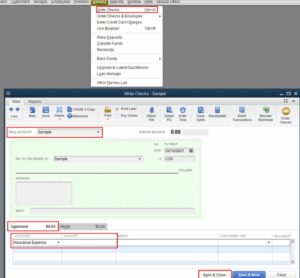
- To register a new loan payment, click on the “Enter Payment” option.
- Enter the payment details, such as the payment date, payment amount, and payment method.
- Allocate the payment amount to principal and interest components by entering the appropriate amounts.
- Verify the allocated amounts and click “Save” to record the payment.
QuickBooks Desktop allows you to manage multiple loans simultaneously through the Loan Manager, making it easier to track loan payments accurately.
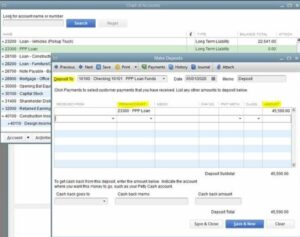
Tracking Loan Balances and Interest in QuickBooks
![]()
To keep track of your loan interest and balances in QuickBooks, follow these steps:
Step 1: Generate Loan Reports
- Go to the Reports menu in QuickBooks.
- Please find the “Loan Reports” or go to the “Company & Financial” section.
- Select the appropriate loan report, such as “Loan List,” “Loan Payment History,” or “Loan Balance Summary.”
Step 2: Review Loan Balances and Interest
- Analyze the loan reports to review loan balances, interest payments, and other relevant details.
- Ensure that the loan balances match the actual loan amounts and that the interest calculations are accurate.
- If you notice any discrepancies, double-check your recorded loan payments and make adjustments if necessary.
Regularly reviewing loan reports in QuickBooks helps you stay informed about your outstanding loans and ensures that your financial records are accurate.
Troubleshooting Common Issues

While recording loan payments in QuickBooks, you may encounter some common issues. Here are a few troubleshooting tips:
Issue 1: Incorrect Loan Balance
If you notice that the loan balance in QuickBooks doesn’t match the actual outstanding balance:
- Verify that all loan payments are recorded accurately, ensuring the correct allocation of principal and interest.
- Check for any missing or duplicated loan payments that may be affecting the balance.
- If needed, reconcile the loan account with your lender’s statements to identify and rectify any discrepancies.
Issue 2: Missing Loan Payments
If you accidentally miss recording a loan payment in QuickBooks:
- Create a new loan payment transaction and enter the missed payment details.
- Allocate the payment amount to principal and interest accordingly.
- Double-check the loan balance and interest calculations after recording the missed payment.
By promptly addressing these common issues, you can ensure that your loan records in QuickBooks are accurate and reliable.
Conclusion
Accurately recording loan payments in QuickBooks is essential for maintaining financial transparency and managing your business’s loans effectively. By following the step-by-step instructions on how to record loan payments in QuickBooks Online, you can confidently record loan payments in both QuickBooks Online and QuickBooks Desktop versions. Remember to regularly review loan balances, and interest calculations, and utilize loan reports to stay informed about your loan obligations.
FAQs
Q 1: Can I record loan payments manually in QuickBooks?
Yes, you can manually record loan payments in QuickBooks by following the steps outlined in this article. It’s important to accurately allocate the payment amounts to principal and interest for proper tracking.
Q 2: How often should I reconcile loan balances in QuickBooks?
It’s recommended to reconcile loan balances in QuickBooks periodically, ideally on a monthly basis. This helps identify any discrepancies and ensures the accuracy of your loan records.
Q 3: Can QuickBooks automatically calculate interest on loans?
Yes, QuickBooks Online has a feature that automatically calculates interest on loans based on the specified payment date and interest rate. QuickBooks Desktop may require manual calculations or the use of third-party loan calculators.
Q 4: What if I want to make extra loan payments in QuickBooks?
If you want to make extra loan payments in QuickBooks, simply record them as separate loan payment transactions. Allocate the extra payment amount to the principal, which helps reduce the outstanding loan balance.

