If you are a business owner or an accountant who uses QuickBooks for bookkeeping, you may come across the term “prepaid expenses.” Prepaid expenses are payments made in advance for goods or services that will be received in the future. Recording prepaid expenses in QuickBooks is essential to accurately track your business expenses and make informed financial decisions. In this article, we will discuss what prepaid expenses are, how to record them in QuickBooks Online, and how to enter them in QuickBooks.
What are Prepaid Expenses?
Prepaid expenses are payments made in advance for goods or services that will be received in the future. Examples of prepaid expenses include rent, insurance, subscriptions, and maintenance contracts. The economic benefits that will be derived from prepaid expenses are considered assets. Prepaid expenses are recorded on the balance sheet and are gradually expensed over the period they benefit the business.
Why Record Prepaid Expenses in QuickBooks?
Recording prepaid expenses in QuickBooks is essential to accurately track your business expenses and make informed financial decisions. Prepaid expenses need to be recorded correctly to ensure that your financial statements reflect accurate financial information. Failure to record prepaid expenses can lead to understated expenses and overestimated profits.
How to Record Prepaid Expenses in QuickBooks Online?
Recording prepaid expenses in QuickBooks Online involves three steps: creating an expense account, recording the prepayment, and setting up the amortization schedule.
Create an Expense Account
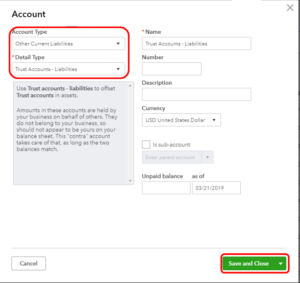
The first step is to create an expense account for prepaid expenses. To create an expense account, go to the QuickBooks Chart of Accounts and select New. Select Expense as the account type and name the account Prepaid Expenses.
Record the Prepayment
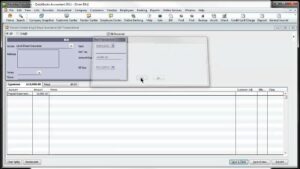
The next step is to record the prepayment. To record a prepayment in QuickBooks Online, go to the Create (+) icon and select Expense. Enter the name of the vendor, the amount of the prepayment, and select the Prepaid Expenses account as the account.
Set up the Amortization Schedule
The final step is to set up the amortization schedule for the prepaid expense. To set up the amortization schedule, go to the Expenses tab and select the expense transaction. Click on the Make recurring button and select Schedule. Choose the frequency and the start date, and select the Prepaid Expenses account as the account. QuickBooks Online will automatically amortize the prepaid expense over the period you have specified.
How to Enter Prepaid Expenses in QuickBooks?
Entering prepaid expenses in QuickBooks involves two steps: entering the bill and setting up the amortization schedule.
Enter the Bill
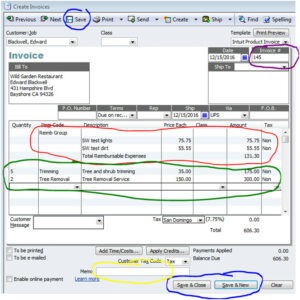
In order to enter the prepaid expense, we must first enter the bill. To enter the bill, go to the Create (+) icon and select Bill. Enter the name of the vendor, the amount of the bill, and select the expense account for the prepaid expense.
Set up the Amortization Schedule
The amortization schedule for a prepaid expense is the process of gradually expensing the prepaid amount over the period it benefits the business. In QuickBooks, you can set up the amortization schedule by selecting the prepaid expense transaction, clicking on the Make recurring button, and selecting Schedule. Then, choose the frequency and start date of the amortization, and select the prepaid expense account as the account. QuickBooks will automatically amortize the prepaid expense over the period you specified. This allows you to accurately reflect your expenses in your financial statements and make informed financial decisions.
Conclusion
In conclusion, prepaid expenses are an important part of managing your business finances. By prepaying for expenses, you can ensure that you have the necessary resources to keep your business running smoothly. QuickBooks provides a convenient and efficient way to record and track prepaid expenses, making it easier for you to manage your finances and make informed decisions. With the step-by-step instructions outlined in this article, you can confidently record and track your prepaid expenses in QuickBooks, ensuring accurate financial reporting and a more successful business.
Frequently Asked Questions (FAQs)
Q.1 : How do I know if an expense should be recorded as a prepaid expense?
An expense should be recorded as a prepaid expense if it benefits the business over a period of time and is paid in advance. If the expense is a one-time payment and benefits the business immediately, it should not be recorded as a prepaid expense.
Q.2 : Can I change the amortization schedule of a prepaid expense in QuickBooks?
Yes, you can change the amortization schedule of a prepaid expense in QuickBooks. Simply select the prepaid expense transaction, click on the Edit button, and adjust the frequency and start date of the amortization as needed.
Q.3 : What happens if I forget to record a prepaid expense in QuickBooks?
If you forget to record a prepaid expenses in QuickBooks, it will not be accurately reflected in your financial statements. This can lead to inaccurate reporting and make it more difficult to make informed financial decisions.

