If you’re a small business owner, invoicing is one of the most critical aspects of your financial management. QuickBooks is a widely popular accounting software that allows you to send professional invoices to your customers quickly. With the QuickBooks Email Invoices feature, you can send invoices electronically and get paid faster, saving you time and effort. However, sometimes you may face issues while setting up or sending invoices through QuickBooks. In this article, we’ll guide you through the setup process and help you troubleshoot some common issues.
Understanding QuickBooks Email Invoices
QuickBooks Email Invoices is a feature in QuickBooks that allows you to sending invoices through quickbooks to your customer. You can customize your invoices with your company logo and branding, choose from pre-designed templates, and add payment links to make it easier for your customers to pay you. You can also track the status of your invoices, whether they are viewed, paid, or overdue.
Benefits of Using QuickBooks Email Invoices
There are several benefits to using QuickBooks Email Invoices, including:
- Saves time and effort: You can sending invoices through QuickBooks quickly and easily through email, eliminating the need for printing and mailing invoices manually.
- Professional look and feel: You can customize your invoices with your company logo and branding, making them look professional and consistent with your brand.
- Faster payments: With payment links added to your invoices, your customers can pay you instantly, reducing the time it takes for you to receive payments.
- Easy tracking: You can track the status of your invoices in real-time, so you know when they are viewed, paid, or overdue.
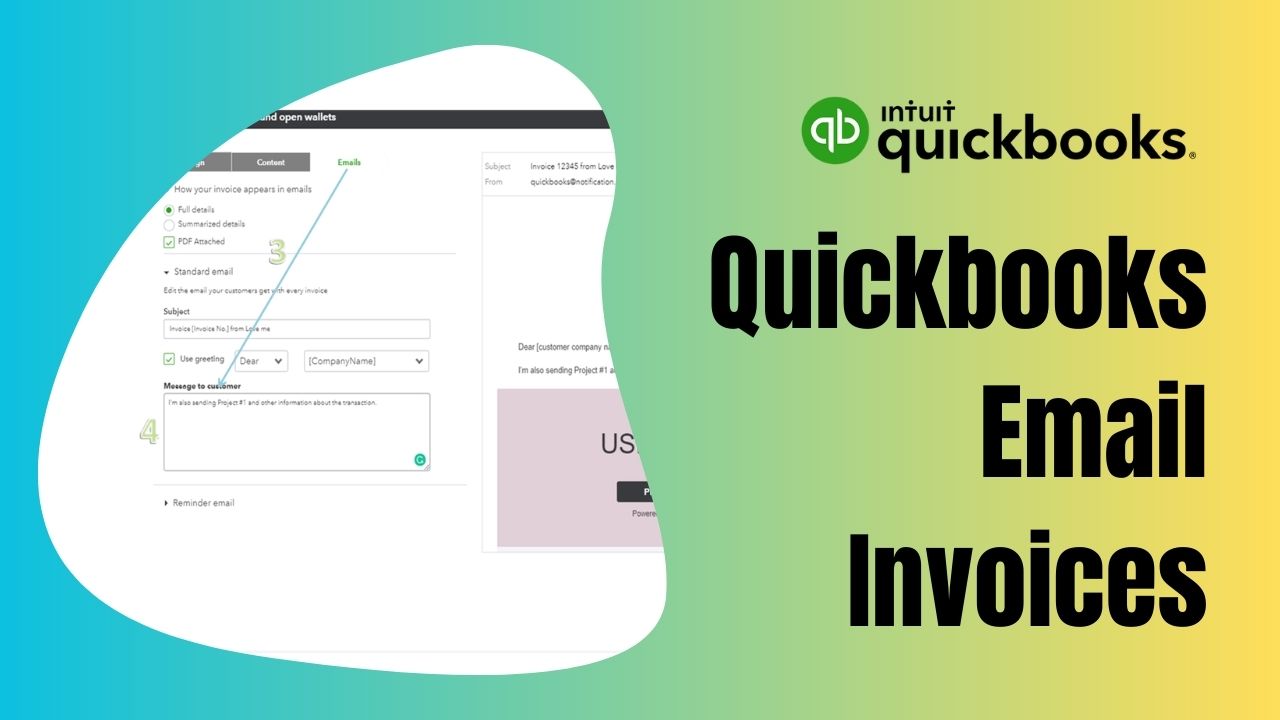
QuickBooks Email Invoices Setup
Setting up QuickBooks Email Invoices is a straightforward process. Follow these steps to get started:
Step-by-Step Guide
- Open your QuickBooks Account and go to the “Customers” tab.
- Click on “Create Invoices.”
- Select the customer you want to invoice and add the items or services you want to bill them for.
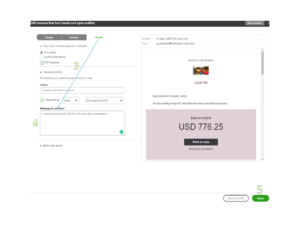
- Once you have added all the items, click on “Save and Send.”
- Choose “Email” from the drop-down menu, and enter the email address of the customer.
- Customize the email message and invoice template if necessary.
- Add a payment link if you want to make it easier for your customers to pay you.
- Click on “Send.”
- You can track the status of your invoices in the “Invoices” tab.
Troubleshooting QuickBooks Email Invoices Issues
While QuickBooks Email Invoices is a convenient and easy-to-use feature, sometimes you may encounter issues while setting up or sending invoices. Here are a few common issues and ways how to troubleshoot them:
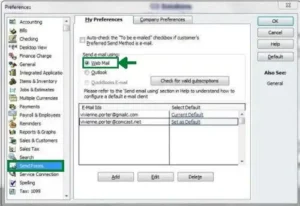
Issue: Unable to send invoices through QuickBooks Email Invoices.
Check your firewall settings to ensure QuickBooks isn’t being blocked from sending emails. You should also ensure that your email preferences are set up correctly within QuickBooks. Double-check that your email address and password are correct, and that the server settings are accurate. If all else fails, try using a different email client to sending invoices through QuickBooks .
Issue: Invoices sent through QuickBooks Email Invoices are going to the spam folder.
Check that the email subject line and content aren’t triggering spam filters. Avoid using words or phrases that commonly trigger spam filters, such as “free,” “discount,” or “limited time offer.” Ensure that your email address is authorized to send emails from your domain by setting up email authentication.
Issue: Customers aren’t receiving invoices sent through QuickBooks Email Invoices.
Check that the email address you’re sending invoices through QuickBooks to is correct. Ask the customer to check their spam folder to see if the invoice was marked as spam. Consider sending a test email to yourself or a colleague to confirm that QuickBooks Email Invoices is functioning properly.
Issue: Invoices sent through QuickBooks Email Invoices aren’t displaying correctly.
Check that the invoice template you’re using is compatible with QuickBooks Email Invoices. Try using a different template to see if the issue persists. You can also customize your template to ensure that it displays correctly when sent through QuickBooks Email Invoices.
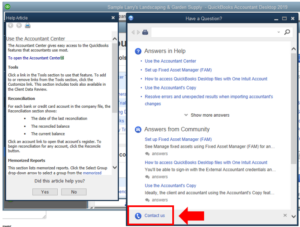
Issue: QuickBooks Email Invoices isn’t working at all.
Try restarting QuickBooks or your computer. Make sure that your QuickBooks software is current with the most recent updates and patches. If all else fails, contact QuickBooks customer support for assistance.
Conclusion
QuickBooks Email Invoices is a valuable feature for small business owners looking to streamline their invoicing process and get paid faster. With the ability to customize invoices and add payment links, it’s an easy and efficient way to manage your finances. However, if you encounter any issues while setting up or sending invoices through QuickBooks , don’t worry, there are easy troubleshooting steps to follow. By following the steps outlined in this article, you’ll be able to quickly resolve any issues and get back to managing your finances with ease.
Frequently Asked Questions (FAQs)
Q1. Can I send recurring invoices through QuickBooks Email Invoices?
Yes, you can set up and send recurring invoices through QuickBooks Email Invoices. To set up a recurring invoice, go to the Customers menu and select Create Invoices. Fill out the necessary information for the invoice, and then click the “Make Recurring” option at the bottom of the window. From there, you can customize the frequency and end date for the recurring invoice, and QuickBooks will automatically send it to your customer according to the schedule you set.
Q2. How can I track whether my customer has paid the QuickBooks Email Invoice?
QuickBooks Email Invoices allows you to track the status of your invoices and see whether they have been viewed, paid, or are overdue. To check the status of an invoice, go to the Customers menu and select Create Invoices. Click on the “Invoices” tab and select the invoice you want to track. The status of the invoice will be displayed under the “Status” column.
Q3. Can I send estimates through QuickBooks Email Invoices?
Yes, QuickBooks Email Invoices allows you to send estimates to your customers. To create an estimate, go to the Customers menu and select Create Invoices. Click on the “Estimates” tab and select “Create Estimates.” Fill out the necessary information for the estimate, and then click “Save and Send” to send it to your customer via email. Your customer can then approve or decline the estimate, and you can convert it into an invoice once it has been approved.

