Are you a business owner who just bought a new piece of equipment or a vehicle for your company? As a fixed asset, it needs to be recorded in your accounting books. QuickBooks Desktop is a popular accounting software used by many businesses, and it offers an easy way to record a fixed asset purchase in QuickBooks Desktop. In this article, we will guide you step-by-step on how to record a fixed asset purchase in QB Desktop.
Understanding Fixed Assets
Before we dive into the process of record a fixed asset in QuickBooks Desktop, let’s first understand what a fixed asset is. A fixed asset is a long-term asset that has a useful life of more than one year and is used in the production of income. Examples of fixed assets include buildings, machinery, equipment, vehicles, and furniture.
How to Record a Fixed Asset Purchase in QuickBooks Desktop
Step 1: Set up a Fixed Asset Account
Before you can record a fixed asset purchase in QuickBooks desktop, you need to have a fixed asset account set up in your chart of accounts. Here’s how to do it:
- Select QuickBooks Chart of Accounts from the Lists menu.
- Click on the New button at the bottom left of the window.
- Select Fixed Asset as the account type and click on Continue.
- Enter a name for the account, such as “Fixed Assets” and click on Save & Close.
Step 2: Create a Purchase Order
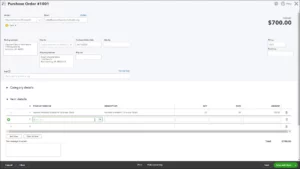
The next step is to create a purchase order for the fixed asset. Here’s how to do it:
- Create Purchase Orders can be found under the Vendors menu.
- Select the vendor from whom you are purchasing the fixed asset.
- Enter the details of the purchase, including the item or service, quantity, and cost.
- Select the Fixed Asset account you created in Step 1 as the account to be used for this purchase.
- Save and close the purchase order.
Step 3: Receive the Item
Once the purchase order has been created, you need to receive the item. Here’s how to do it:
- Go to the Vendors menu and select Receive Items.
- Select the purchase order.
- Enter the quantity received and the date of receipt.
- Click on the Item tab and select the fixed asset item.
- Enter the cost of the fixed asset and select the Fixed Asset account.
- Save and close the receipt.
Step 4: Record the Payment
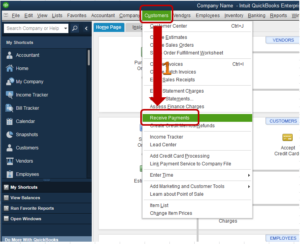
The final step is to record the payment for the fixed asset purchase. Here’s how to do it:
- Select Pay Bills from the Vendors menu.
- Select the bill associated with the fixed asset purchase.
- Enter the amount paid and the payment method.
- Save and close the payment.
Conclusion
Record a fixed asset purchase in QuickBooks Desktop is a simple and straightforward process. By following the step-by-step guide we provided, you can ensure that your fixed asset purchases are properly recorded in your accounting books. Remember, accurate accounting is essential for the success of your business.
Frequently Asked Questions (FAQs)
Q.1 What is the difference between a fixed asset and an expense?
Fixed assets are long-term assets with a useful life of more than one year that are used to generate income. Examples of fixed assets include buildings, machinery, equipment, vehicles, and furniture. On the other hand, prepaid expenses are costs that are incurred in the day-to-day operations of a business, such as rent, salaries, and utilities.
Q.2 Can I record a fixed asset purchase as an expense in QuickBooks Desktop?
No, you cannot record a fixed asset purchase in QuickBooks Desktop. Fixed assets must be recorded separately in your accounting books to accurately reflect their value and depreciation over time.
Q.3 How do I calculate the depreciation of a fixed asset in QuickBooks Desktop?
QuickBooks Desktop provides a built-in feature to calculate the depreciation of fixed assets over time. You can set up the depreciation schedule for each fixed asset and the software will automatically calculate the depreciation expense each accounting period.
Q.4 What if I make a mistake when recording a fixed asset purchase in QuickBooks Desktop?
If you make a mistake when record a fixed asset purchase in QuickBooks desktop, you can easily correct it in QuickBooks Desktop. Simply locate the transaction in your accounting books and make the necessary adjustments or corrections.

