Timesheets are a vital component of efficient time tracking and accurate payroll management in businesses of all sizes. QuickBooks, a widely used accounting software, offers powerful features and functionalities to streamline the process of creating, editing, and managing timesheets. In this guide, we will provide a detailed step-by-step walkthrough on how to enter timesheets in QuickBooks Online and how to edit timesheets in QuickBooks Desktop, including editing, entering, and correcting dates, make timesheets unbillable in QuickBooks, and timesheets in QuickBooks Premier.
Using Timesheets in QuickBooks Desktop
Step 1: Enabling Timesheets
- Start by opening QuickBooks Desktop and accessing your company file.
- Go to the “Edit” menu and select “Preferences.”
- From the left-hand menu, select “Time & Expenses” and go to the “Company Preferences” tab.
- Find the option labeled “Do you track time?” and verify that the checkbox beside it is selected.
- Adjust the appropriate settings by selecting “Yes” for the desired options.
- Click the “OK” button to save the modifications.
Step 2: Entering Timesheets in QuickBooks
- Go to the “Employees” menu and select “Enter Time” and then “Use Weekly Timesheet.”
- Choose the name of the employee from the available options in the dropdown menu.
- Fill in the required information, such as the date, customer/job, hours worked, and any billable or non-billable status.
- Please select the “Save & Close” option to save the timesheet.
Step 3: Editing Timesheets
- Access the “Weekly Timesheet” window within QuickBooks Desktop.
- Locate the desired timesheet and double-click on it to open.
- Make the necessary modifications, such as updating hours or changing customer/project details.
- To save the changes, select the “Save & Close” option.
Step 4: Correcting Dates in Timesheets
- Open the timesheet that requires date correction.
- Update the date fields with the correct information.
- Double-check the changes to ensure the accurate dates are reflected.
- Click “Save & Close” to save the corrected timesheet.
Using Timesheets in QuickBooks Online
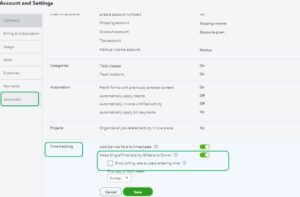
Step 1: Enabling Timesheets
- Log in to your QuickBooks Online account.
- Click on the Gear icon in the upper right corner and select “Account and Settings.”
- Choose “Advanced” from the left-hand menu.
- Please navigate to the “Time Tracking” section and click on the edit icon indicated by a pencil.
- Activate the “Add Service field to timesheets” feature and select “Save.”
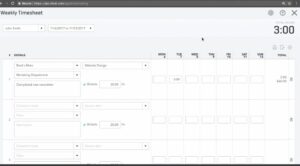
Step 2: Creating Timesheets
- Click on the Plus (+) icon in the upper right corner and select “Weekly Timesheet” under the “Employees” section.
- Choose the employee’s name from the drop-down list.
- Fill in the details, such as the hours worked, the customer/project associated with the time, and any billable or non-billable status.
- Click “Save” or “Save and New” to add another timesheet.
Step 3: Editing Timesheets
- Navigate to the “Weekly Timesheets” section.
- Locate the timesheet you want to edit and click on it.
- Make the necessary changes, such as updating the hours worked or modifying the customer/project details.
- Click “Save” to save the changes.
Step 4: Correcting Dates in Timesheets
- Open the timesheet you need for correcting payroll timesheets dates in QuickBooks.
- Update the date fields with the correct information.
- Ensure that the changes reflect the accurate dates and click “Save.”
Marking Timesheets as Unbillable in QuickBooks
Step 1: QuickBooks Online
- Locate the timesheet you want to mark as unbillable.
- Open the timesheet and remove the association with the customer or project.
- Save the timesheet to mark it as unbillable.
Step 2: QuickBooks Desktop
- Open the timesheet you want to mark as unbillable in QuickBooks Desktop.
- Clear the customer/job field by deleting the associated information.
- Save the timesheet to mark it as unbillable and prevent the hours from being included in customer invoices.
Conclusion – Timesheets in Quickbooks
By following the detailed steps outlined in this comprehensive guide, you can effectively utilize timesheets in QuickBooks Online, QuickBooks Desktop, and QuickBooks Premier. Accurate time tracking, seamless payroll management, and precise reporting are essential for the smooth operation of businesses, and leveraging timesheet features in QuickBooks is a valuable tool for achieving these goals.
Frequently Asked Questions
Q1: Can I edit a timesheet after it has been submitted for payroll in QuickBooks?
Yes, you can edit a timesheet even after it has been submitted for payroll in QuickBooks. In QuickBooks Online, locate the submitted timesheet under the “Weekly Timesheets” section, open it, make the necessary changes, and save the updated timesheet. In QuickBooks Desktop, open the timesheet from the “Weekly Timesheet” window, edit the required fields, and save the changes. It is important to note that any modifications to a timesheet that has already been used for payroll may impact the accuracy of payroll calculations.
Q2: How do I correct the dates on a timesheet in QuickBooks?
If you need to correct the dates on a timesheet in QuickBooks, you can easily do so. In QuickBooks Online, open the timesheet, update the date fields with the correct information, and save the changes. In QuickBooks Desktop, open the timesheet, modify the date fields with the accurate dates, and save the corrected timesheet. It is crucial to ensure that the dates reflect the actual work period to ensure accurate payroll calculations.
Q3: Can I mark a timesheet as unbillable in QuickBooks?
Yes, you can mark a timesheet as unbillable in QuickBooks to prevent the hours worked from being included in customer invoices. In QuickBooks Online, open the timesheet, remove the association with the customer or project, and save the timesheet to mark it as unbillable. In QuickBooks Desktop, open the timesheet, delete the customer/job information, and save the timesheet to designate it as unbillable. By marking timesheets as unbillable, you ensure accurate reporting and avoid unintentional billing to clients.
Q4: Are timesheets available in QuickBooks Premier?
Yes, timesheets are available in QuickBooks Premier. QuickBooks Premier is an advanced version of QuickBooks that offers enhanced features and functionalities. You can use timesheets in QuickBooks Premier by following the same steps as in QuickBooks Desktop. Enable timesheets in the preferences, enter and edit timesheets as needed, and utilize the various features available to manage employee work hours, payroll, and reporting efficiently.

